

In our homeschool co-op, we have been learning about the brave early explorers during the Age of Exploration so mama had to hit the internet and figure out how to make a quadrant. This has been such a fun unit – and I’m pretty sure I’ve learned even more than the children! This week, we set out to make our own quadrants, but first…
Have you ever wondered how sailors could navigate the open seas in the days before GPS? Back in the 1400s and 1500s, there weren’t even any reliable maps yet! Yikes! How did the explorers know where to go across the ocean? Well, they used three simple tools to navigate this great unknown:
- The compass
- The hourglass
- The quadrant
Used together, these three instruments – the compass, the hourglass, and the quadrant – were called dead reckoning and provided early sailors with a rough estimate of their location and direction for navigation. You’re probably familiar with a compass and an hourglass, but…
What Exactly is a Quadrant?
The quadrant was an instrument that sailors used to determine their latitude, so they would know if they needed to sail towards the north or south. It effectively measured the altitude of the sun or stars and then provided the ship with a rough measurement of their latitude on the globe. It was called a quadrant, meaning one-fourth, because it actually was one-fourth of an astrolabe, a circular navigational tool used to measure altitude.
Navigators of the past used the stars to guide them across the oceans in what was called Celestial Navigation. First, they looked for Polaris, or the North Star, which is on the tip of the handle of the Little Dipper constellation.
Once the sailor found Polaris, he knew which way was north. But, where on the globe was the ship?
This is where the quadrant came in handy. If a ship was on the Equator, the North Star would measure at 0 degrees using the quadrant. If the quadrant showed a reading of 30 degrees, that meant the ship was at roughly 30 degrees latitude. Brilliant!
READ: Do You Know Your Child’s Learning Style?
How to Make a Quadrant
So, I set about digging through Pinterest to find a DIY How to Make a Quadrant that seemed do-able for a classroom of elementary kids in our homeschool co-op.
First, I stumbled across this really helpful site and this one abut how to make a quadrant. Then, I ended up borrowing the quadrant image from here and tweaking it to create my own DIY How to Make a Quadrant Project. Now, I’m offering it for free to you with all the instructions so you know exactly what to do.
Easy peasy!
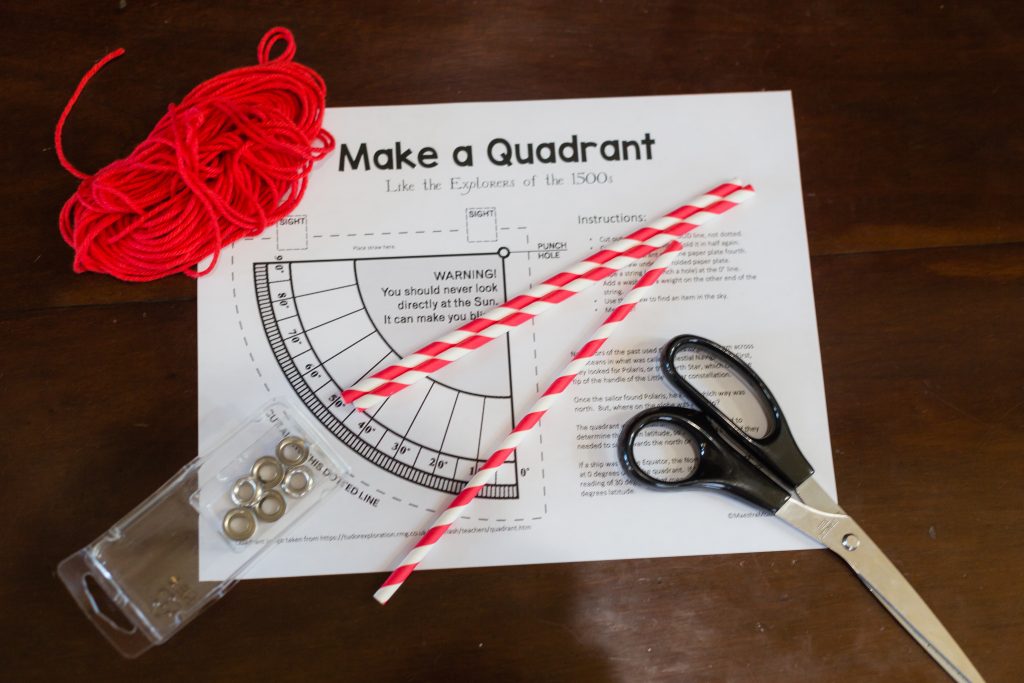
Materials to Build a Quadrant
- Drinking Straw
- String
- Washer (or other weight)
- Paper plate (1/2 plate per child)
- Quadrant worksheet
- Scissors & glue
DIY Quadrant Directions
- Download and print the How to Make a Quadrant worksheet
- Cut out the quadrant along SOLID line, not dotted.
- Cut a paper plate in half. Fold it in half again.
- Slip a straw under the folded paper plate and glue it shut around the straw.
- Glue the quadrant onto the paper plate fourth. Make sure the straw runs along the 90° line.
- Tie the string at the 0° line.
- Add a washer as a weight on the other end of the string.
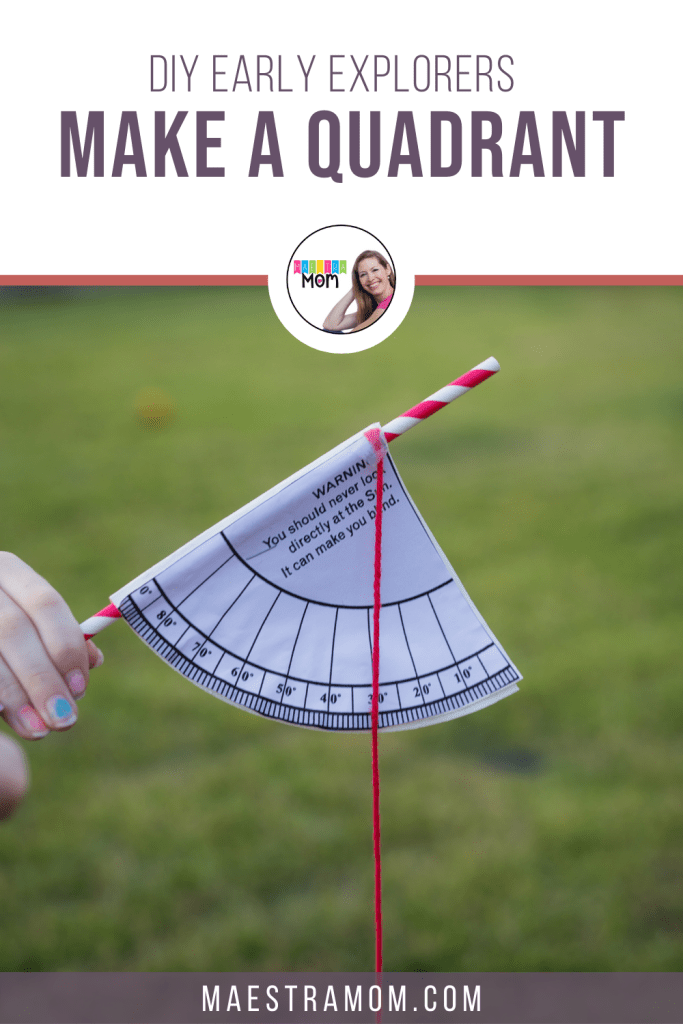
- Use the straw to find an item in the sky. (Never look directly at the sun!)
- Measure!
Tips for Quadrant Success
So the real quadrant did not have a straw for aiming the instruments, but I added one based on some I saw on Pinterest…and quickly discovered it was a brilliant idea. Without the straw, the quadrant can be tricky for elementary kids to aim and measure, making this a pretty pointless activity. The straw makes it quick and easy by proving a way to aim.
Just explain that the actual quadrant used by the sailors probably did not include the straw…
When gluing the quadrant onto the paper plate, be careful to line the fold of the paper plate up with the 90° line then tie the string onto the straw right next to the 0° line. If you don’t feel like tying the string, a piece of tape works just as well, too.
READ: Simple Salt Dough Recipe for Making Fossils & Maps
One caution – make sure you review skip counting by 10s and how to read basic angles before doing this Age of Exploration activity! It is an excellent math lesson as well as a hands-on-history lesson!
Also, we learned that it is definitely more effective to work in pairs when using the quadrant. Have one child spy an object through the straw while the other child reads the measurement. It can be tricky if working alone for young kids to both look through the straw AND grab the string to get an accurate reading.
Additional Quadrant Resources
Before making our quadrant, we learned the concept of latitude (like rungs of a ladder) and longitude (it’s LONG!) by watching this Brain Pop! Longitude and Latitude video.
We reviewed the continents and oceans by singing our favorite Seven Continents Song and Five Oceans Song, then talked about how a quadrant helped sailors determine their latitude so they would know which direction they needed to sail.
Next, we made our very own quadrants then headed out to the big hallway to spy objects and measure our pretend latitude using our new quadrants! Super fun!
Altogether, I think this hands-on-history activity only took us about 10 minutes to actually make the quadrants. It’s just a simple cut-and-paste. The real fun is in learning about these amazing early explorers and understanding the remarkable instruments they developed to be able to conquer the magnificent oceans. What a feat!
And what a fun, memorable way for us to learn about the Age of Exploration, too. Grab your free copy here so you can do the activity as well!
UP NEXT: DIY Colored Glue Craft Recipe
Pingback: 7 Ways to Get Your Kids Hooked on History - Maestra Mom